Hi and welcome to my blog!
This April my challenge is to blog about all things
scrapbooking from A to Z.
Today’s letter is a brand new to me, so please tell me if I’m doing this right – F is
Foil.
Foil is a metallic overlay that acts much like a
transfer. You apply a glue (there are a few to choose from), then lay the foil over
it, and press it down so it sticks. The foil paper is designed to bind with the
glue, where once removed, only the adhered areas remain.
The use of foil is popular right now in paper crafts,
and as I’ve never utilized foil for my scrapbook pages before, this is a new
experience.
I did my homework and checked out several tutorials before
I tried my hand at it.
I found a few techniques that work well:
The first was using Stick It paper. Stick It are
sheets of flat adhesive that have release paper on both sides. The product is a
versatile way to cut shapes, or thoroughly cover die cuts.
 |
To start, I cut out a medium-small circle to be my golden “sun”.
|
 |
| I peeled off one side of the release paper and applied the glue shape to my paper. |
 |
| Using a bone folder (you can use any flat edged instrument, like a plastic credit card or a popsicle stick), rubbed down the glue thoroughly. |
 |
| Next, I peeled off the opposite side of the release paper (leaving the sticky side up). |
 |
| I cut a piece of foil (please ignore my fuzzy socks J ). |
 |
| Then I applied the foil (silver side down) over the glue. |
I rubbed again with my bone folder, heavily pressing down the circumference of my image.
|
 |
| And – Ta-Da! – a SUN! |
 |
| One area didn’t transfer well, but not bad for a first attempt. |
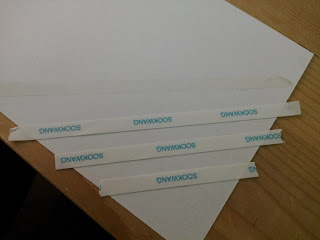
For the second technique, I used strong double-sided tape.
 |
| Following the same steps, I laid down the adhesive. |
 |
| Removed the release paper. |
 |
| Applied the foil, and rubbed to bind. |
 |
| The lines of gold turned out amazing. I’m eager to try this with a scrapbook page in the near future. |
I’ve seen additional glue techniques that utilize
foil effectively:
-
You can use clear or rubber stamps with craft
glue.
-
There are brands of adhesive paper
available that come in pre-cut shapes.
-
Like the lines I did today, you can use a tape runner, or double-sided
tape.
-
Heat embossing powder (stamp with embossing
ink, apply embossing powder, heat, and apply foil while hot).
-
Rubber cement
-
For a smooth, flawless result, you can use
a laminating machine. (Apply adhesive, add foil, sandwich with blank paper, and
feed through laminating machine).
If you have tried any of these styles and want to
give me some pointers, please leave a comment below, I’d love the feedback.
From what I’ve seen, all of these options work well
and give you that beautiful, gilded look.
I think that blings out my letter F. I never thought gold
was my metal (I’m more a silver girl), but it looks pretty good on paper, and it's oh-so shiny. J
Well, this A-Z challenge is chugging along, only one more
letter before we knock out the first week, which is fantastic progress.
I have many fellow blogsters out there offering awesome themes: Quotes, Movies, and Inspirational Poems – anything you're interested in, we got it. Please check them out by searching the keywords
#AtoZChallenge.
And if you’re ready for more scrapbooking how-to, tomorrow’s
letter is a biggie- G is for GLUE & ADHESIVES.
See you then!
-
SNG


This is the tape I use for everything just about. I have yet to try foil and now I am wanting to give it a go! I am wondering how it would look for leaves and such
ReplyDeleteHi Birgit - That's cool, I've just started using Stick It, it works well! I'm glad you want to give foil a try - the effect is pretty. I bet leaves would look gorgeous. Thanks for stopping by!
ReplyDelete