Hi and welcome back!
April is full of scrapbooking know-how as I blog every
day, each day corresponding to a letter in the alphabet. Today, I is for
IMPRESSIONS.
Impressions are made of stamps and ink. Any way you
can impress on a page.
Along with die cuts, stamping is a technique I’ve
really gotten into lately. The tool of many card makers, stamping is a fun way to
add to your scrapbook pages. Like cropping tools, the types of stamps have developed
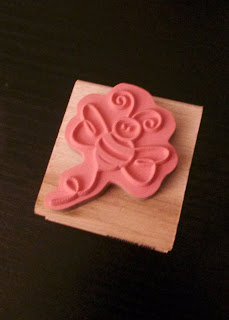
over the years. In the beginning stamping consisted mostly of rubber stamps
mounted on wooden blocks.
Now, many stamps come in clear cling variation, which
allows you to control and position the images better.
Inks have advanced as well, offering a choice of
formulations, which can be used to shade and color backgrounds as well as
imprint images.
There’s many ways to incorporate impressions into your
scrapbooking.
This first example is simple, but makes for a pretty accent.
I don’t traditionally create a music page, but every
once in a while I’ll have a year full of songs with lyrics and symbolism that
speak to me.
One song that I’ve had on repeat is called “Feels Like
Home.”
I found a stamp in a day planner stamp set that
matched the song title, so I added it to the page. Just a clean imprint, cut out,
and adhere with some foam or a pop dot. The result was perfect.
And if you don’t want simple, you can go all-out
with stamping, too.
For my second example I utilized a Hero Arts - My Monthly Hero card making kit (March 2017). It’s a spring stamp set that
I couldn’t resist picking up (the bunnies were too cute).
I stamped and colored several wabbits, as well as a
bunch of the vegetables.
The kit came with a die cut that can be used to create the “dirt” (and the water I showed in the B post). I
assembled the pieces, and glued down with Ranger Matte Multi-Medium. I backed
up the free floating areas (the ears and the stems) with slivers of foam, so they would pop.
Looking at it, you would think I used stickers, that’s
how realistic impressions can be.
The page turned out better than I’d imaged, and a great example for this post. J
And that wraps up our letter I - I thank you for checking out my blog!
I'm excited for this weeks' letters - they are heart of scrapbooking, so I hope you’ll stop back by tomorrow – J is JOURNALING.
See you soon!
-
SNG


I love my wooden stamps and like them actually better than the peel stamps because, after a while they don't stick as well and can even warp a bit. I love your creation here..very cute and love the background
ReplyDeleteHi Birgit! You're right - the traditional rubber stamps also hold up well when working with permanent inks. There's interesting pros and cons to each type. Thank you for the comment. :)
ReplyDelete